Homemade Peanut Butter Cups with Rice Crisps
Highlighted under: Daily Recipes
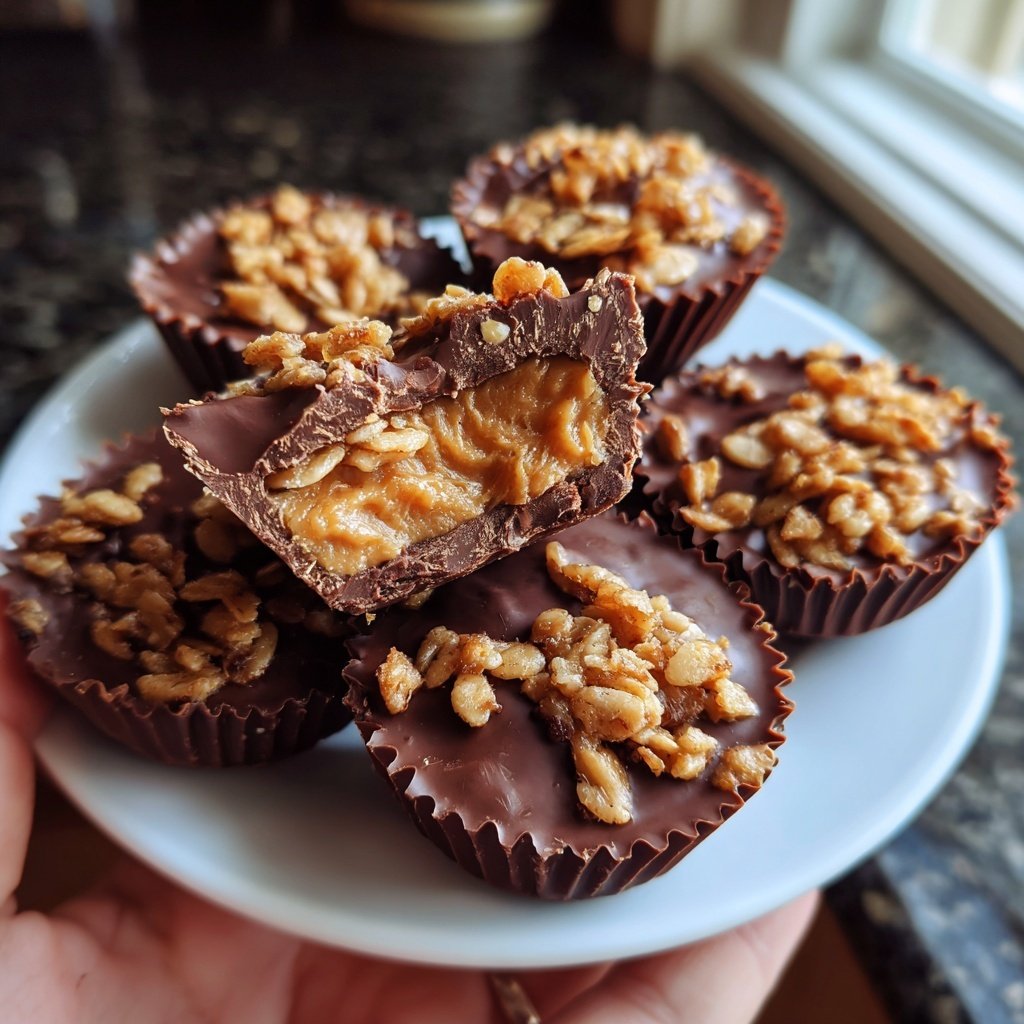
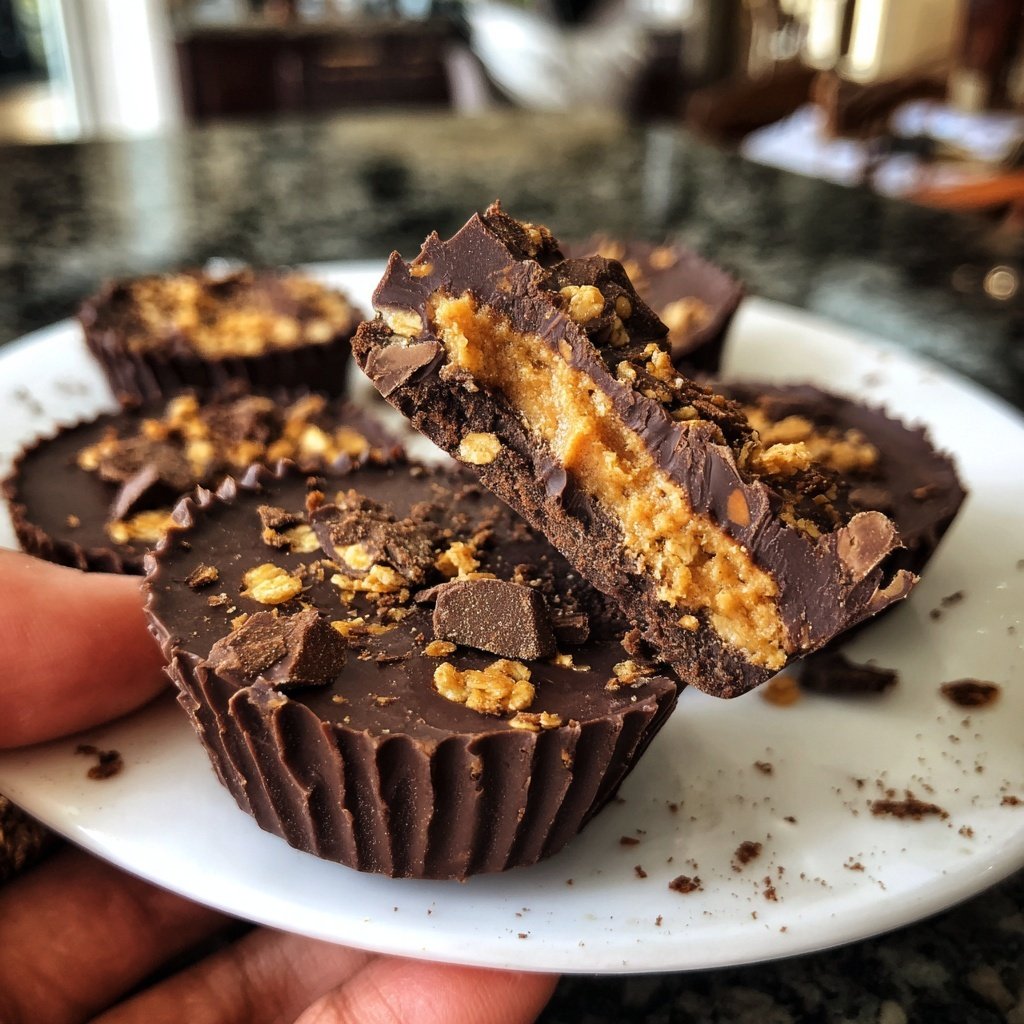
I absolutely love making Homemade Peanut Butter Cups with Rice Crisps! Each bite brings together the creamy richness of peanut butter and the delightful crunch of rice crisps, making it an absolute treat. This recipe is not only indulgent, but it's also simple to prepare in my own kitchen. I enjoy the process of melting the chocolate to create a smooth layer that envelops the peanut butter filling. Trust me, once you try these, store-bought versions will never compare!
Creating these peanut butter cups from scratch was such a rewarding experience! I remember the first time I decided to experiment with rice crisps in the filling. The crunch added a delightful surprise that elevates the flavor profile, making it not just a dessert, but a fun treat anytime. The combination works beautifully!
To ensure a perfect texture, I recommend using quality chocolate for the coating. I also found that letting the cups chill for a full hour allows the layers to set properly, giving them that perfect bite. Trust me, a little patience goes a long way in achieving the best results!
Why You'll Love This Recipe
- The unique crunch of rice crisps adds an unexpected twist.
- Rich, creamy peanut butter filling combined with silky chocolate.
- Quick and easy to make, perfect for satisfying your sweet tooth.
Peanut Butter and Rice Crisps: A Perfect Match
The combination of peanut butter and rice crisps is truly delightful. The creamy texture of the peanut butter provides a rich, nutty flavor, while the rice crisps deliver a satisfying crunch. This unique contrast gives your homemade peanut butter cups an irresistible texture that adds depth to each bite. It's important to use a creamy peanut butter for this recipe, as it will blend seamlessly with the sugars and other ingredients. If you prefer a healthier option, you can use natural peanut butter, though it may alter the sweetness slightly, so adjust the powdered sugar accordingly.
When incorporating the rice crisps, be careful to fold them in gently. This will help maintain their crunchiness and ensure they don't get soggy. If you're looking for an extra flavor dimension, consider toasting the rice crisps in a dry skillet for a few minutes until they’re lightly golden. This subtle toasting enhances their nuttiness and serendipitously brings out a lovely flavor when paired with the chocolate coating.
Mastering the Chocolate Coating
Melting chocolate can be a tricky process if not done correctly. To achieve a glossy and smooth chocolate coating, it's crucial to melt your chocolate chips slowly. Using a microwave is convenient, but be cautious. Start with 30-second intervals and stir each time. This will prevent the chocolate from burning or seizing due to excessive heat. If you notice the chocolate starting to thicken, remove it from the microwave and stir until it reaches a liquid consistency. The ideal melted chocolate should flow easily and have a beautiful sheen.
Another way to elevate your chocolate layer is by using a mix of chocolate types. For example, combining milk chocolate with dark chocolate can deepen the flavor profile and give your cups a more sophisticated taste. Just be mindful to maintain the proportions so the melted chocolate still coats well. If you're feeling adventurous, adding a bit of sea salt over the final chocolate layer can create a delightful sweet and salty contrast that enhances the overall flavor experience.
Ingredients
Gather your ingredients below:
For the Peanut Butter Filling
- 1 cup creamy peanut butter
- 1/4 cup powdered sugar
- 1 cup rice crisps
For the Chocolate Coating
- 1 1/2 cups milk chocolate chips
Once you have everything ready, you can move on to the next steps!
Instructions
Follow these steps to create your own delicious peanut butter cups:
Prepare the Filling
In a mixing bowl, combine the peanut butter with powdered sugar until smooth. Fold in the rice crisps gently until well incorporated.
Melt the Chocolate
In a microwave-safe bowl, melt the milk chocolate chips in 30-second increments, stirring in between, until smooth.
Assemble the Cups
Line a muffin tin with cupcake liners. Pour a layer of melted chocolate into the bottom of each liner, and then add a spoonful of the peanut butter mixture on top. Finish with another layer of melted chocolate to cover the filling.
Chill and Serve
Place the muffin tin in the refrigerator for about an hour to allow the chocolate to harden. Once set, enjoy your homemade peanut butter cups!
Enjoy your delicious homemade treat!
Pro Tips
- For a more intense flavor, try using dark chocolate for the coating. You can also add a sprinkle of sea salt on top of the chocolate before refrigerating for an added touch.
Storage Tips
After making your peanut butter cups, proper storage is key to preserving their texture and flavor. Keep them in an airtight container at room temperature for up to a week. However, if you want them to last longer, consider refrigerating them, where they can stay fresh for about two weeks. Just be sure to let them come to room temperature before serving, as this will soften the chocolate slightly and enhance its melt-in-your-mouth quality.
If you want to prepare these cups in advance, they can also be frozen. Place them in a single layer in a freezer-safe container, separated by parchment paper, to prevent sticking. They can stay in the freezer for about three months. To thaw, simply leave them at room temperature for an hour or so, or enjoy them frozen for a delightful crunchy treat!
Delicious Variations
Feel free to get creative with your homemade peanut butter cups. You can swap the rice crisps for crushed pretzels for a sweet-and-salty twist, or even modify the filling by mixing in ingredients like shredded coconut or chopped nuts. Each addition brings a new flavor and texture, keeping your treat interesting. Consider also experimenting with different types of nut butters, such as almond or cashew, for a unique take.
If you'd like to make these treats dairy-free, opt for dairy-free chocolate chips and ensure you’re using a nut butter without added dairy. You can substitute maple syrup for powdered sugar for a touch of natural sweetness. No matter how you customize them, these variations keep the core essence of creamy, crunchy, and chocolaty intact while allowing for personal preferences.
Questions About Recipes
→ Can I use crunchy peanut butter instead?
Yes, crunchy peanut butter works great for an extra texture!
→ How long do these cups last?
They can last up to a week in an airtight container at room temperature.
→ Can I make these vegan?
Absolutely! Use dairy-free chocolate and confirm your peanut butter is vegan.
→ What can I substitute for rice crisps?
You can use crushed graham crackers or nuts if you prefer a different texture.
Homemade Peanut Butter Cups with Rice Crisps
What You'll Need
For the Peanut Butter Filling
- 1 cup creamy peanut butter
- 1/4 cup powdered sugar
- 1 cup rice crisps
For the Chocolate Coating
- 1 1/2 cups milk chocolate chips
How-To Steps
In a mixing bowl, combine the peanut butter with powdered sugar until smooth. Fold in the rice crisps gently until well incorporated.
In a microwave-safe bowl, melt the milk chocolate chips in 30-second increments, stirring in between, until smooth.
Line a muffin tin with cupcake liners. Pour a layer of melted chocolate into the bottom of each liner, and then add a spoonful of the peanut butter mixture on top. Finish with another layer of melted chocolate to cover the filling.
Place the muffin tin in the refrigerator for about an hour to allow the chocolate to harden. Once set, enjoy your homemade peanut butter cups!
Extra Tips
- For a more intense flavor, try using dark chocolate for the coating. You can also add a sprinkle of sea salt on top of the chocolate before refrigerating for an added touch.
Nutritional Breakdown (Per Serving)
- Calories: 120 kcal
- Total Fat: 8g
- Saturated Fat: 4g
- Cholesterol: 5mg
- Sodium: 50mg
- Total Carbohydrates: 12g
- Dietary Fiber: 1g
- Sugars: 8g
- Protein: 3g